How to Delete Temporary Internet Files in Windows 11
You are not the only one who is finding the answer to how to delete temporary internet files in windows 11, and here is the complete solution for you step by step.
Every PC user has a certain amount of storage on their device. Due to regular work, internet browsing, and downloading, some temporary files accumulate in the storage and slowly fill up. Windows 11 offers several options for deleting temporary files to free up space on the hard disk when your computer device runs out of storage.
What Are Temporary Internet Files?
The Microsoft operating system uses a folder called Temporary Internet Files to store all internet browser history and caches. All installed web browsers, notably Internet Explorer, use the directory on a global scale to save the content of web pages or websites the user accesses. It is used for offline browsing and to hurry the loading of pages from frequently visited websites.
How to Delete Temporary Internet Files in Windows 11?
Temporary files don’t typically create issues, but they can consume a significant amount of hard drive space over time. The storage runs out of space at the end of a long time. But if you are a Windows 11 user, you have some solutions to remove temp internet files safely. We will discuss below some latest ways how you delete these unusual files.
1. Delete Temporary Files Using Settings on Windows 11
On Windows 11 Settings app also contains a handy, trustworthy temporary file cleaner tool. You can choose to delete particular categories of temporary files in this setting. You have greater individualized control over the Temp File cleansing procedure than over storage sense. This is the end of deleting the temp file with that temporary file cleaning process.
- Go to the Start menu and select the Settings option.
- Click on the system menu’s Storage tab from the settings option.
- Click Temporary files to see all cleaning options on the window.

- To clear the most disk space, check all the temporary file checkboxes. Then you can liberate terabytes of space by choosing the Windows Update Clean-up option.
- At last, press the Remove Files button.
2. How to Automatically Delete Temporary Files With Storage Sense
Windows 11 has a Storage Sense feature that kills temporary system and app files. So, enabling that feature can save you from manually deleting such files. You can activate that feature like this.
Storage Sense is a feature in Windows 11 that deletes temporary system and program files. You can avoid manually deleting these files by turning on that function. Let’s check out the process:
- Click on the Search tool icon on the taskbar.
- Input the keyword “Storage Sense” in the search box.
- Select Turn on Storage Sense in the search results.
- Switch on the Storage Sense toggle.
- The Storage Sense toggle switch

- Then click the “>” arrow on the Storage Sense option to bring up the settings directly below.

- Check the box to automatically delete transient system and program files to keep Windows operating efficiently.
- Activate the option for Automatic User Cleanup Material.
- Click the Run Storage Sense drop-down menu to choose an automatic cleanup routine for eliminating temporary files.
- Select the option with the most consistent scheduling every day.
- Click the Run Storage Sense now option to erase temporary files with Storage Sense manually.
3. How to Erase Temporary Files via Command Prompt
By using the command prompt, you can quickly delete a temporary file. The processes are below:
- Enter cmd in the search text box by pressing Windows + S.
- In the search results, right-click of your mouse Command Prompt and choose the Run as administrator option from the context menu.
- Press Enter after typing the command below.

4. How to Delete Temporary Files With Disk Cleanup
In Microsoft Windows 11, Disk cleanup is a build tool to erase temporary internet files. For instance, the checkbox option in Disk Cleanups’ Recycling Bin, delivery optimization, language variant, log, and Microsoft Defender files allows you to remove temporary files.
- Launch the taskbar search box in Windows 11.
- Click the search icon in the taskbar.
- Type “Disk Cleanup” into the search box after it has opened.
- To access it, click Disk Clean-up in the search results.

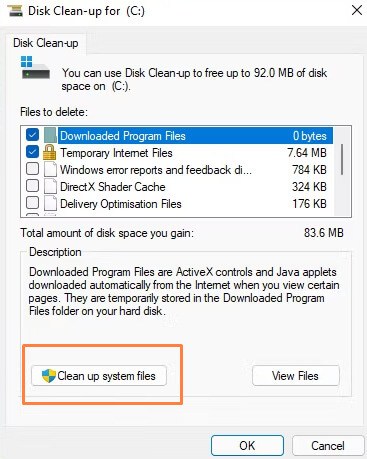
- Select “Clean up system files” on the menu.
- Choose the files for Windows Update Clean-up, Temporary Internet Files, and Temporary Files. As an alternative, you can check every checkbox there.

- Press the OK key.
- Make your selection for Delete Files.
5. How to Delete Temporary Files With a Batch File
Batch files include several commands to execute. You can configure batch files for various tasks, including deleting temporary files. These instructions can create a batch file that will delete temporary data.
- First, pick All programs from the Start menu.
- Then choose Notepad from the list of apps on the Start menu and launch it. Using the Ctrl + C key, copy the batch file code below:
rd%temp% /s/q
md%temp%

- Then hit Ctrl + V to paste the code into Notepad.
- Choose File from the menu, then select Save As.
- Choose File from the menu.
- Using the menu, select Save.
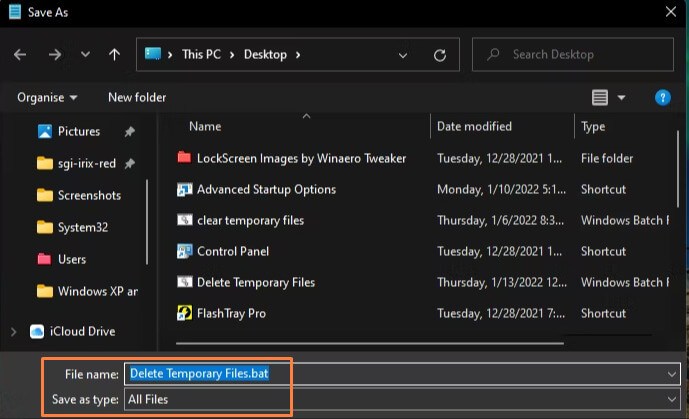
- On the Save as type drop-down menu, choose All files.
- Delete Temporary Data.bat should be typed into the File name field.

- The window’s Save As button
- Choose Desktop as the location.
- Select Save from the menu.
- Double-click the Delete Temporary Data batch file on your desktop after that.
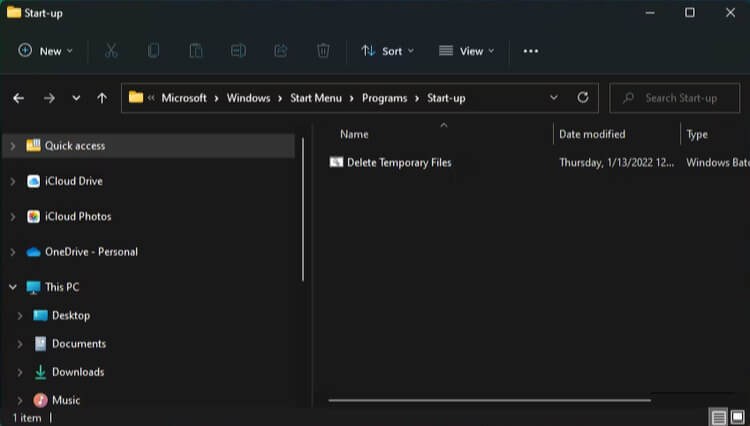
You may select that batch file from your desktop whenever you need to delete temporary files. You may have it run automatically by adding that batch file to the startup. To do this, copy the file into the beginning folder as displayed.
- Select the Copy option by right-clicking the Delete Temporary Data batch file on the desktop.
Start Run by pressing Windows + R. - Type %appdata%\microsoft\windows\start menu\programs\startup\ in the Open box, and click the OK option.
- The batch file is then pasted into the startup folder by pressing the hotkey Ctrl + V.

6. How to Manually Clear the Temp Folder
The temp folder contains many of the temporary files on your device. It is possible to erase the folder’s contents manually using File Explorer. Your data can be deleted using these steps.
- To run, press the Win+R key.
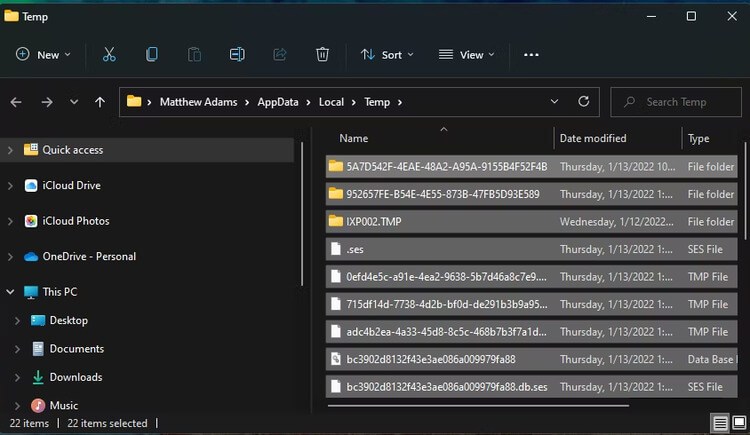
- In Run, Enter %Temp%, then click OK.
- After selecting all the material using the Ctrl + A key, click the delete button in the command bar.

- Using a temporary file prevents you from operating, as indicated by a dialog box on the window. Click the Skip button after checking the Do this for all current items box in that dialog box.

- The Recycle Bin might contain the temporary files you delete using this technique. Double-click that bin’s desktop icon to empty it. Then choose Empty Recycle Bin from the menu.

What Is the Benefit of Deleting Temporary Internet Files?
Your browser stores information from a website in temporary files in its cache when you view it for the first time. Your browser will load the website from the cache copy when you revisit it rather than downloading it from the Internet again. It occurs low disc space on your device.
This procedure seeks to make browsing faster overall. You’ll experience faster load times if you access website pages from the cached version that has been stored. However, there are some drawbacks to caching files, so clearing the cache can occasionally be beneficial.


