How to Upgrade From Windows 11 Home to Pro? – Easy Steps to DIY

Microsoft, with almost every Windows OS launch (starting from Windows 7), launches 2 different versions of the same operating system. A ‘Home’ version and a ‘Pro’ version. While the Home version is the base version that comes with every PC/ Laptop in their OEM version, the Pro version is designed for more business and professional work with more facilities and remote controlling features.
So, simply saying, Microsoft tailored their OS according to the needs of every type of user they have. As per the name suggests, Microsoft has a lot to offer you in the upgraded Windows 11 Pro version than Windows 11 Home version if you’re looking for some more features for your work or business for that matter.
Since most of the PC or Laptop’s OEM OS is Windows 11 Home, if you need Windows 11 Pro, you can upgrade it to Pro from Home easily. In this article, we’ll guide you through the DIY steps on how to upgrade from Windows 11 Home to Pro.
Why You Need to Upgrade Windows 11 Home to Pro?
Windows 11 Pro includes advanced features that are not available in the Home edition. So, comparing both editions side by side provides a better understanding of the differences between their features. We are mentioning a few of the improved, upgraded, and additional features that you’ll get in the Pro version which you’ll not get as a Windows 11 Home user.
Features | Windows 11 Home | Windows 11 Pro |
BitLocker device encryption | No | Yes |
oint Active Directory/Azure AD | No | Yes |
Hyper-V | No | Yes |
Microsoft Remote Desktop | Client only | Yes |
Windows Sandbox | No | Yes |
Windows Information Protection | No | Yes |
Mobile device management (MDM) | No | Yes |
Group Policy | No | Yes |
Assigned Access | No | Yes |
Enterprise State Roaming with Azure | No | Yes |
Dynamic Provisioning | No | Yes |
Kiosk Mode | No | Yes |
Windows Update for Business | No | Yes |
Maximum RAM | 128 GB | 2 TB |
Number of CPUs | 1 | 2 |
Number of CPU cores | 64 | 128 |
Now, discover some of the essential additions to get a short overview of Windows 11 Pro features and their capabilities. described below:
- BitLocker Encryption: If you need a strong protection tool for your PC, BitLocker encryption is an ideal choice. It helps users to safeguard their PC from external attackers and allows users to access the PC.
- Remote Desktop Support: Windows 11 Pro includes Remote Desktop Support or RDS for managing a PC from a remote location. Whether you are at home or out of the country, it doesn’t matter. You can perform regular tasks as you do in the office.
- Hyper-V Virtualization: Windows 11 Pro offers Hyper-V virtualization that allows users to create and run virtual machines (VMs). This feature helps users to test specific software or risky apps without damaging the host PC.
- Azure Active Directory: The Pro edition contains Azure Active Directory, which enables single sign-on to cloud resources and applications. It provides access to device and app management.
- Space in RAM: There is a huge RAM difference between Windows 11 Home and the Pro version. The Home edition supports up to 128 GB of RAM, while the Pro edition supports 2 TB. So, the user of Windows 11 Pro gets more space to perform heavy work.
Purchase Windows 11 Pro Activation Code Before Upgrading (If You Don’t Have)
If you want to upgrade Windows 11 Home to Pro, you have two options – either buy a Windows 11 Home to Pro upgrade key or just Windows 11 Pro activation key. The full version can work both as an upgrade key and a full installation key.
Can’t differentiate? Let us help you out! So, the Windows 11 Pro upgrade key only works on a PC with a licensed Windows 11 Home OS installed on it. However, you’ll not be able to use it during full installation. Since all PCs come with an OEM version of Windows 11 Home, that’s not an issue!
There is another option for you to choose from is the Windows 11 Pro OEM version. The OEM version is not reusable and is only available for the PC it is getting installed on. Currently at Msckey, the Windows 11 Pro OEM version only for just $18. So, now you know which option is the way to go!
How to Upgrade From Windows 11 Home to Pro?
Upgrading from Windows 11 Home to Pro is a simple process. You can upgrade Windows 11 Home to Pro easily if you have a valid product key. Otherwise, you can upgrade via the Microsoft app. Follow our guides to perform the upgrade:
-
Open Activation Settings
- Press the Windows icon on your Windows 11 home screen and type Activation Settings to open in the search bar.
- Under the System tab, you can see the Activation > Activation State and Upgrade your edition of Windows option.
- If you want to upgrade the Windows edition, expand it and click on ‘Change Product Key‘ or ‘Upgrade’ in the Microsoft App.
-
Check Windows Activation Status
- If you don’t know your Windows Activation Status, click on Activation State to expand the option.
- Check your Windows Activation Status is Active and shows: “Windows is activated with a digital license”.
Note: If your Windows Activation Status shows “Not Active”, activate it before upgrading.
Enter Windows 11 Pro Product Key
After checking Windows activation status, it’s time to enter the Windows 11 Pro license key. Here is the process:
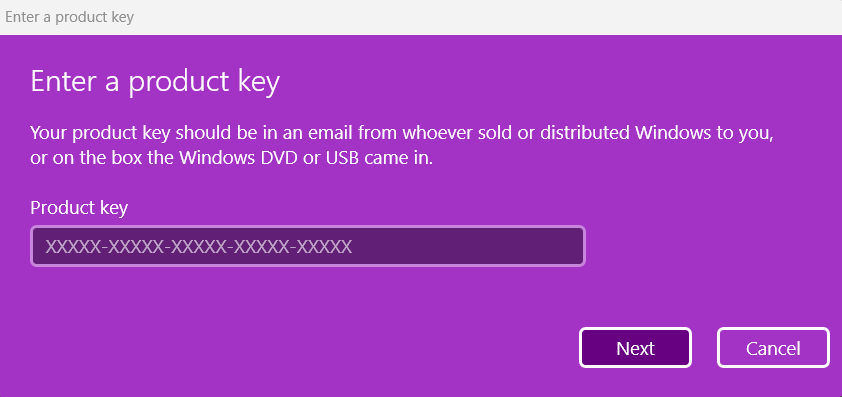
- Open the Activation page and expand Upgrade your edition of Windows, then click on the Change button beside the Change Product Key option.
- Enter the 25-digit Windows 11 Pro Key.
- Now, click Next and follow the upgrade procedures.
Upgrade to Windows 11 Pro Via Microsoft Store:
Another way to upgrade your Windows 11 Home to Professional is via the Microsoft Store. Have a look:
- In the Activation Settings, click Open Store next to Upgrade your edition of Windows.
- It will open the Windows 11 Pro purchase page.
- Press Buy and sign in to your Microsoft account.
- Follow the instructions to complete the Windows 11 Pro upgrade.
After your purchase, the upgrade will automatically begin.
5. Restart Your Computer
- When you complete the Windows 11 Pro purchase or enter the license key, the upgrade will start in the background.
- The PC takes time to configure the new OS edition.
- Restart your computer after completing the Windows upgrade.
The activation license key from Microsoft app will cost you about $99.00. Once you purchase it from there, your Windows activation key will automatically be embedded with your Microsoft account. And your Windows 11 Pro will activate instantly.
Thus, this is how you upgrade from Windows 11 Home to Pro yourself, in simple and easy steps.
Conclusion
Windows 11 Pro has a lot more professional features that you might need if you’re looking for an appropriate OS for your business. However, for basic use, Windows 11 Home is more than okay to use. This article compares Windows 11 Pro vs Windows 11 Home, why you should upgrade to Pro, where to buy Windows 11 Pro license keys, and how to upgrade Windows 11 Home to Pro. Follow these steps to upgrade your Windows OS in a smooth way. Let us share your opinion in the comment section and bookmark Msckey to get all the latest software tips and tricks.


