Fix Microsoft Windows Search Indexer High CPU Usage in Windows 10/11

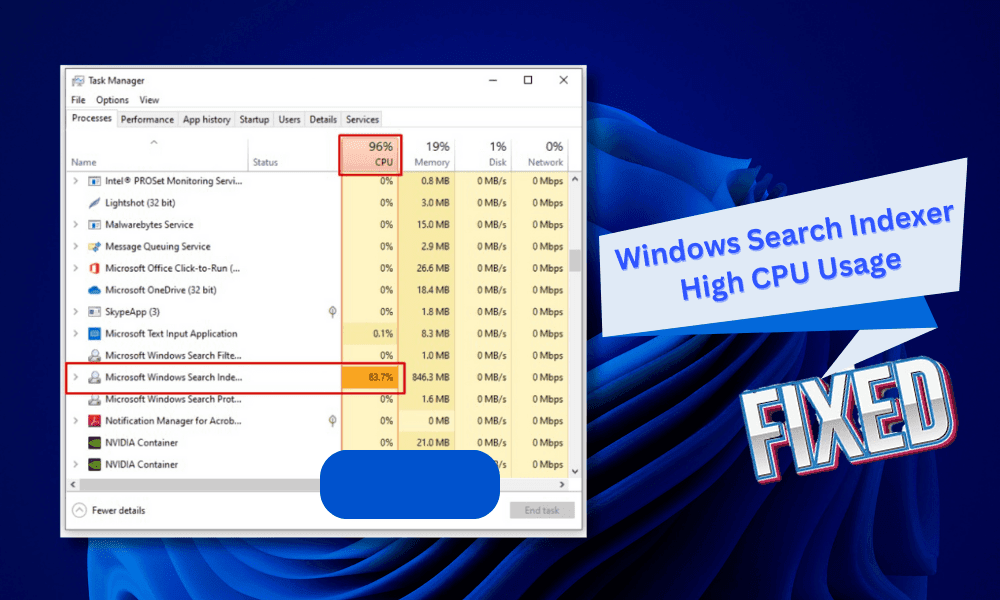
The Windows Search Indexer is the Windows Service that handles file indexing while performing a search. Running as a background process, it lets you look for your Windows device’s files, emails, and other contents. However, it can trigger some annoying issues, like consuming a high amount of your device’s CPU. Throughout this guide, we will discuss the reasons and fixing methods for resolving the Microsoft Windows Search Indexer high CPU usage issue.
Reasons for Microsoft Windows Search Indexer High CPU Resources
Many reasons fuel the high CPU usage by Search Indexer. Knowing these reasons will give you a clear view of your issues and apply the fixing methods. The following reasons are mainly responsible for this issue;
Searching and Indexing a Large Number of Files
Searching and indexing on a large Windows database may use a significant amount of your CPU, especially while using a low-spec CPU. In this scenario, you can limit the search range to avoid high CPU usage.
Change in File System
If you initiate a search immediately after making a change on the device file system, it may cost high CPU usage. If so, performing a device restart could help you to resolve the CPU usage issue. You can also encounter the same issue while simultaneously changing the system and searching the local locations.
Poor Device Specifications
The device specifications play a vital role while conducting a search on your Windows device. For this reason, you may face higher CPU usage while searching or indexing, especially when your device doesn’t meet the operating system’s requirements.
Issues with the Windows Search Indexer Settings
Windows search indexer may consume the CPU at a high rate when there is an issue with the search settings. If the high CPU usage issue of the Search Indexer causes the problematic settings, you can rebuild the Search database and Index to resolve the issue.
Best 5 Fixes for Microsoft Search Indexer High CPU Usage
Knowing the root causes is always helpful in applying the fixing methods of any issues or problems. Now, the reasons behind high CPU usage for Windows Search Indexer are known to you; it’s time to apply the fixing methods. The below troubleshooting methods will help you to fix the high CPU usage issues;
1. Run Searching and Indexing Troubleshooter
Microsoft has included multiple troubleshooting options for almost every Windows built-in program. With these, you can troubleshoot any issues with these programs. Searching and Indexing have a dedicated troubleshooting option to resolve the issues. The following instructions will help you to run the searching and indexing troubleshooter;
- Open the device Settings (Windows + I key) and navigate through System > Troubleshoot > Other Troubleshooters.
- From Other Troubleshooter, scroll down through the troubleshooter list and locate the Search and Indexing.
- Once you find the troubleshooter, click the Run button beside it. Follow the on-screen instructions to complete the troubleshooting process.

2. Restart Windows Search Service
The minor issues of almost every program or application can be resolved with a simple restart of that program or application. Windows Search service is not an exception to this. To restart the Windows Search service, follow the below instructions;
- Launch the Run Dialog Box (Windows + R key), type msc on the dialog box, and press enter to open the Windows Services Program.

- From the Windows Services window, locate the Windows Search from the Services (Local) list.

- Double-click on the Windows Search Service to open the Windows Search Properties (Local Computer).
- On the Properties window, click Stop and then Start to Restart the Windows Service (You must wait for a while after stopping the service).
3. Limit the Search/Index Range
As mentioned, searching on a wide location or drive can cause high CPU usage, which can be resolved by limiting the search/index range. Following instructions will help you to limit the search or index range;
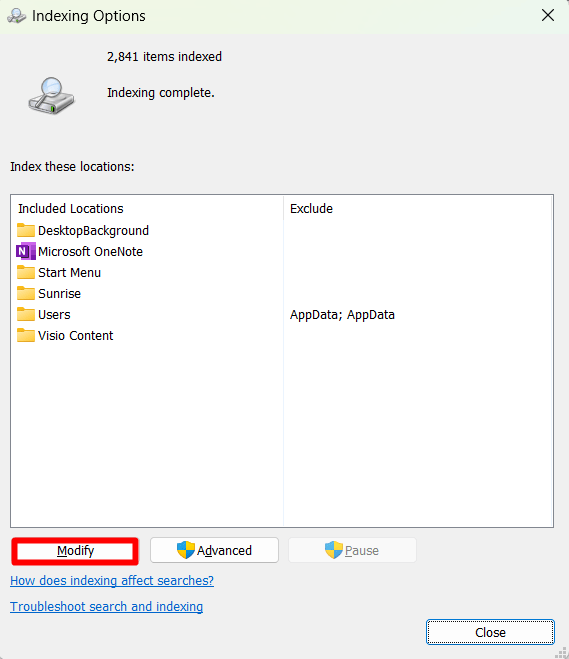
- Press the Windows Home button, type index on the Search Box, and double-click the Indexing Options from the top of the search result to open it.

- From the Indexing Options window, click the Modify button to open the Indexed Locations.

- From the Indexed Locations window, unmark all the options except your system drive (C

- Press OK after making the changes on the Indexed Location window, and then press Close on the Indexing options window.
4. Run System File Checker
The System File Checker, or sfc, detects and fixes a device system’s missing and corrupted system files. With the following instructions, you can execute the sfc command;
- Open the Run Dialog Box by pressing the Windows and R key, type cmd on the dialog box, and press ctrl + shift + enter to open the Windows Command Prompt with elevated access. Press the Yes button when the user account control prompts.

- Execute (typing the command and pressing enter) the sfc/scannow command through Command Prompt. It will automatically initiate the System File Checker to fix the issues with system files.

5. Recreate Search Database and Index
Rebuilding or recreating the search database will remove and replace the existing one with a new one. With this, your existing search database will be completely erased along with its issues. The following instructions will help you to do so;
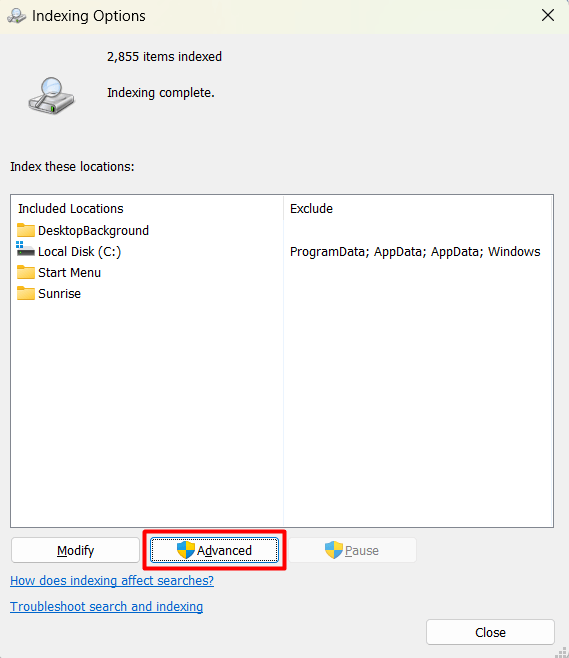
- Go to Windows Search Box (Windows key + S), type index, and select Indexing Options from the top of the results list; double-click on it to open the Windows Indexing Options settings window.

- On the Windows Indexing Options settings window, press the Advanced button to open the Advanced Options settings pop-up.

- In the Advanced Options window, go to the Index Settings tab and click the Rebuild button on the Troubleshooting Box. Click on Ok when the Rebuild Index prompt appears.

Conclusion
We’ve already touched the finishing line together with discussing the resolving methods of the Microsoft Windows Search Indexer high CPU usage issue. To efficiently search through your Windows device’s local locations, it is always better to limit the search ranges. That’s all for today, have a great day.
Editors Pick:
5 Easy Fix for High CPU Usage Caused by .NET Runtime Optimization Service
[5 Fixes] Remote Desktop Connection not Working in Windows 11


